pyRevit + MCP + Claude Code Tutorial
Jun 15, 2026
In the last year, we've tried and reviewed several ways to use AI inside Revit.
Combining pyRevit MCP + Claude Code seems to be the most powerful setup.
It also happens to be free, beyond having a Claude subscription. However, this one isn't quite "plug and play". There are a few steps you must follow to get the setup going.
Special thanks to Alex Ritivoi and Jean-Marc Couffin for the help.
And last thing: pyRevit is free and open-source, and maintained by volunteers. Consider donating to the project: link
There are three key features of pyRevit + MCP that make it so powerful with Claude Code.
1- pyRevit MCP has a MCP tool to generate and run Python code on the spot.
2- pyRevit can easily let you create extensions.
3- Claude Code is extremely good at generating code and self-correcting.
Combine these three powers together, and you get an insanely helpful combo. For almost any Revit task you can think of, ask Claude Code to solve it. It will generate Python code. If it finds a bug or the code doesn’t work, it will self-correct.
If you are happy with the results, you can ask to create a custom tool in a new pyRevit extension and deploy to your colleagues.
Although it is possible to use the pyRevit MCP server with the regular Claude chat mode, we recommend using Claude Code to unleash the full potential.
If you aren’t familiar with Claude and AI concepts, such as the MCP server, make sure to read this guide.
For this tutorial, you will need:
- An active Claude paid subscription
- Claude Desktop application (link here)
- Full admin rights on your computer
- pyRevit installed (link here)
- Git is installed (see below)
Open Claude desktop application and go to the Code tab.
You will need to install Git: https://git-scm.com/install/windows
Git is a free tool that tracks versions of files and folders, which Claude Code needs running in the background to safely work with your local files. In some cases, you might need to restart your computer after installing Git.
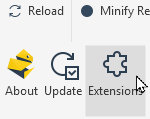
Go to the Extensions menu in pyRevit. Find mcp-server-for-revit-python. Click on Install Extension.
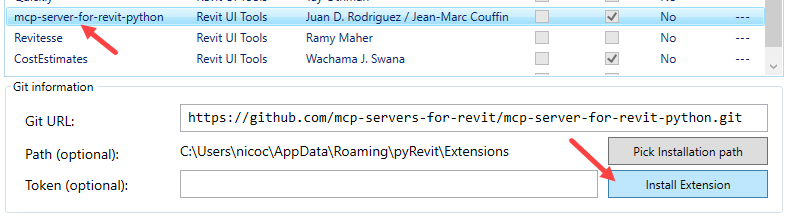
You notice there is a Path name. This is something you can customize if necessary. Copy that value for the next step.
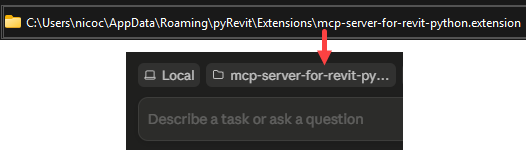
Inside Claude Code, use a local environment and select the folder where the MCP server was installed.
Then, paste this link in the chat:
https://github.com/mcp-servers-for-revit/mcp-server-for-revit-python
Ask Claude Code to install the MCP server and guide you through the process. You might need to allow access a few times.

Claude Code might ask you to accomplish tasks by yourself, such as installing uv, a tool to manage Python packages.
But Claude doesn’t always understand its own capabilities. You can simply ask to do it for you. Just say:
Install uv for me yourself.
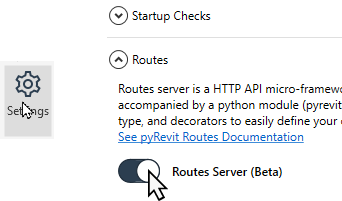
You need to set a route in pyRevit. Go to the pyRevit settings and select Routes.
Activate the Routes Server (beta).
By default, the Bind Address is set to 0.0.0.0. This is not ideal from a security point of view. It’s better to switch to 127.0.0.1

Find the pyRevit config file.
Go to the AppData/Roaming/pyRevit folder. Open pyRevit_config.ini.
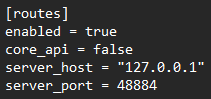
Search for “Routes”. Add these lines:
server_host = “127.0.0.1”
server_port = 48884
It should look like this:
Save the file and close. This will be more secure. Restart Revit and Claude Code.
There are a couple of steps here that Claude Code might be confused about. You can add these instructions when chatting:
My pyRevit Routes server uses host 127.0.0.1 and port 48884 — make the MCP server connect to exactly that, and use 127.0.0.1, not localhost.
If uv fails to install Python, don’t get stuck on it — set the server up another way using my system Python instead, and update my MCP config to match.
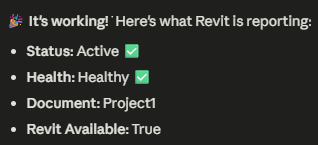
Then, open a Revit model, ensure everything is enabled, and ask Claude Code to verify if the MCP connection works.
Claude can self-troubleshoot if issues arise in the installation. You might need to restart Claude Desktop a few times.
In the local folder you have selected, you should create a CLAUDE.md (markdown) file with extra instructions. This isn’t mandatory, but will improve the results of your prompts.
Use this prompt to generate the Claude.md file:
Set up a CLAUDE.md so you remember how my setup works in future sessions. Do these steps:
By now, the MCP server should be working. You can simply ask Claude Code to accomplish tasks in your Revit model.
This will generate Python code on the spot and run it.
For example, you can ask: “Delete all trees visible in the active view.”
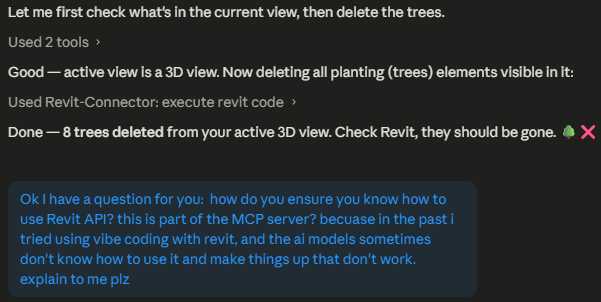
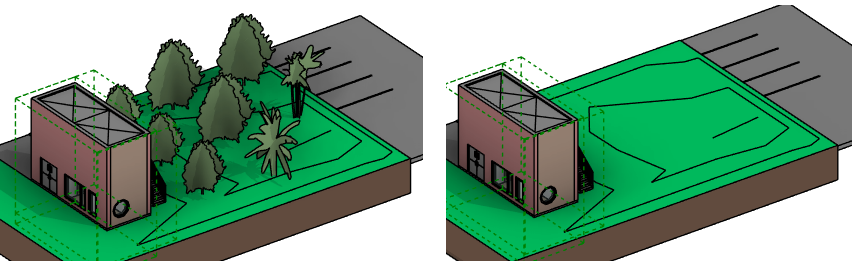
This is a technical point, but important: the pyRevit MCP server runs Python code with a tool called execute_revit_code.
Other MCP servers, such as the NonicaTab and the official Autodesk, have pre-made tools. You can execute actions without the need to generate code on the spot.
But pyRevit’s MCP is different. The main attraction is that it runs code on the spot.
Basically, that means you can do anything with the pyRevit MCP server that exists with the Revit API. This is incredibly powerful, but with a few limitations. It runs slower than other pre-made MCP tools.
You can even see the Python code generated:
Fair warning: AI-generated code executed with pyRevit MCP server might not work for more complex tasks, especially when it involves generating several dialog boxes and UI interaction.
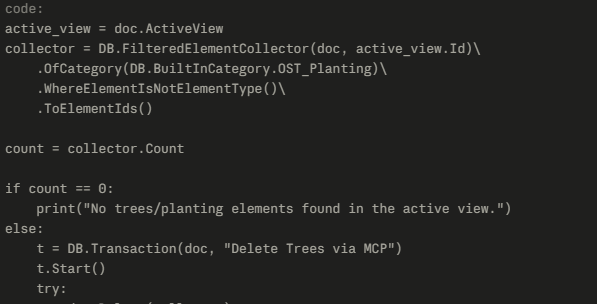
In our tests, we were able to generate a wall, but it didn’t work out with stairs.
Overall, AI code works fine for light to repetitive tasks, but is still tricky and unreliable for complex tasks such as modeling.
Something interesting that a normal Revit add-in cannot do: instructions for a complex, project-specific task.
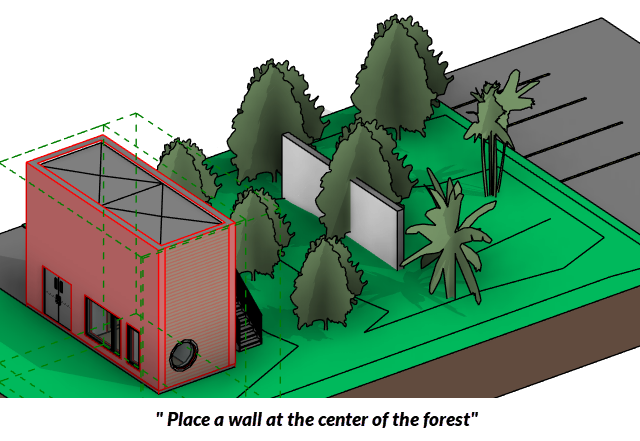
Prompt: Fix as many warnings as you can inside this model.
Claude tells me there are some warnings that can be fixed, and others I’ll need to fix myself.
It managed to fix 23 warnings. I didn’t need to detail every little step to fix the different types. It figured it out by itself.
Warning: running this kind of task on an active project could be risky.
This is something we have explored in a previous video, but also possible with the pyRevit MCP.
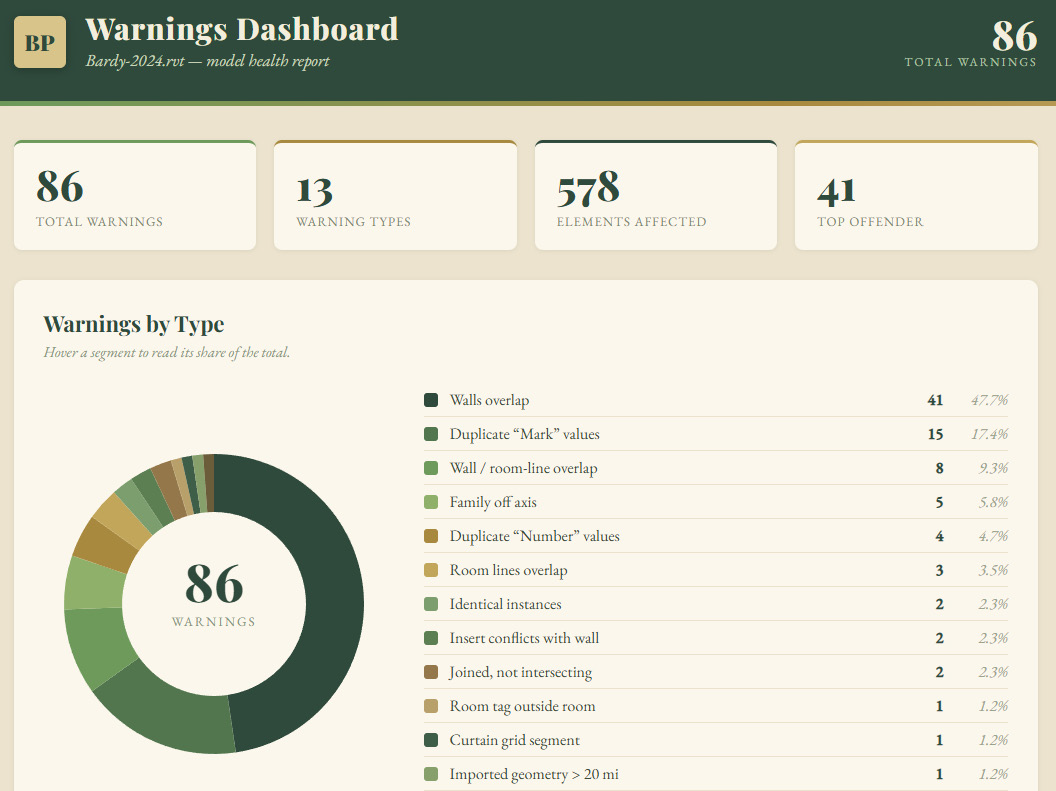
You can ask Claude Code to generate a dashboard with project information. A difference between regular Claude chat and Claude Code is that the file will be created on your computer, not on the cloud. You’ll need to open the file to see it.
Here is the prompt:
Build a Revit warnings dashboard for this model.

1- Number of warnings by type
2- Include a pie chart
3- nice serif style beige and green UI super good looking.
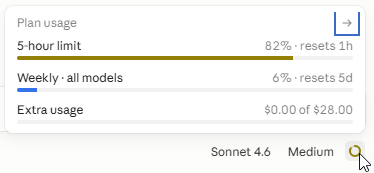
For light, simple tasks, you can use Sonnet.
For complex tasks and multi-steps, such as creating a new extension, you should use Opus.
However, Opus burns a lot of tokens. You will most likely hit your limit with only a few prompts. In Claude Code, you can click on the circle to view your current limits.
Use pyRevit MCP server to explore tasks and scripts. It is also great for one-off tasks you won’t reuse in the future.
If you need to reuse tools in the future, convert them into a pyRevit extension. You can even push this extension to your colleagues, so they all have access to the same toolset.
Limitations: vibe-coding user interface or more complex tools won’t always work. This doesn’t replace all addins. But simple, repetitive, project or firm-specific tasks are amazing for this.
We've created a free PDF guide about this setup, which includes an extra tip about how to easily generate a pyRevit extension using the same workflow. Enter your email address to download.
We’re planning a new live course in the late summer / early fall of 2026. This will include live sessions with various masters in BIM + AI. Topics covered:
Key Claude AI Concepts
pyRevit + Claude Code
MCP Servers for Revit
Claude Cowork to vibe work in BIM
And more. The course will also include videos and tips on how to leverage this pyRevit MCP + Claude Code workflow. This will be included in the BIM Pure membership.
Get on the waitlist at https://bimpure.com/claude
Enter your details below to get this free guide.